Address: The North Chapel, Ashlands Road, Ilkley, LS29 8JT


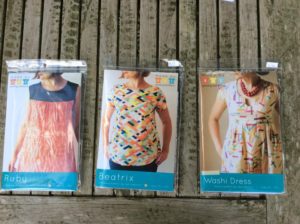
This week I have welcomed new students to The Sewing Shed who have been inspired by The Great British Sewing Bee to embark on dressmaking for the first time. I thought it would be helpful to list some top tips to help demystify dressmaking, and to reinforce what new sewers have been taught in their first class.
1: Dressmaking is the term used for all clothes making, not just sewing dresses.
2: Always check that the dressmaking pattern will fit you! There are body measurements and finished garment measurements on the reverse of the packet of most good patterns. Get your tape measure out and check, don’t go by your usual high street size as these will differ by as much as 3 sizes. Above the measurements in inches is your corresponding dress sizes.
3: Why are there 2 sets of measurements; body measurements and finished garment measurements? Body measurements are your vital statistics, but it is worth measuring the finished garment measurements against your body so you can see how roomy the garment will be when finished. This is to allow for ease of movement when you are wearing the garment, but you may decide to go down a dress size for a closer fitting look.
4: The measurements are shown in inches on all patterns. Some patterns have them in metric as well – often explained in French on the right hand side of the reverse of the pattern packet. Dressmaking is traditionally in inches and it has stayed this way.
5: How much fabric will I need? Fabric is sold in 2 widths; 115cms and 150cms. Below your corresponding size, on the packet, it will tell you how much fabric you need. I suggest you take the pattern to the fabric shop and let them help you with this bit, as sometimes more is required for a bold pattern to match the pattern repeat.
6: A dressmaking pattern has many sizes inside the pattern. You need to cut out the dress size that you require. For speed though, I always roughly cut out the pattern pieces first with paper scissors, then pin the pattern really well onto the fabric placing pins parallel to the edge just inside the size you are going to cut out. Any tricky bits mark the line with a highlighter pen. Then cut accurately on the size line that you require using bent handled fabric scissors.
7. Always aline the directional arrows on your pattern pieces parallel with the selvedge of your fabric. The selvedge is the manufactured edge as it comes off the loom, often there are small pin like holes along these edges. Doing this ensures a straight grain to give the garment the correct drape. Fabric should be cut double, with the right side of the fabric folded together – the wrong side of the fabric facing out. It is helpful to mark the wrong side of the fabric with chalk crosses.
8. Always embrace pattern markings; notches and tailors tacks. Notches are the small little triangles on the edge of the pattern. Cut inwards exactly on the lines for neat accurate notches. Dots on your pattern pieces, should be marked with a tailors tack; thread a hand needle with a brightly coloured double thread, with no knot. Start on the top of the paper pattern and take the thread through the pattern and fabric layers twice as if you were doing a loop the loop on a roller coaster. Carefully pull the tack through the paper and separate the 2 fabric layers, which will take up the slack in the loops, snip the thread with a small scissors between the two layers of fabric.
9. Take all your pins out of the pattern paper, except one – so that the pattern is still attached to the fabric and the piece can be easily identified. If your garment is more than 8 pieces you should name each piece individually to limit mistakes. Low tac masking tape labelled with biro pen is useful for this.
10. Test your stitch on a scrap piece of like fabric, use a Gutterman ‘sew all’ polyester thread as this glides through the fabric and gives a strong seam. Don’t just use the stitch length that is available when you turn your sewing machine on – a mid range stitch is good for dressmaking.
December 7, 2016